Despite the appearance of a new operating system settings interface in Windows 10, you still have to go to the old "Control Panel" for some options. In this article, we will explain how you can add a command to the Windows context menu to access this element.
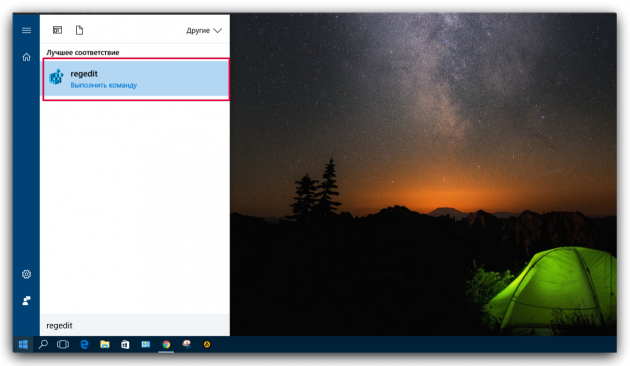
1. Open the Registry editor. To do this, click on the "Start" button, type the word regedit on the keyboard and click on "Enter".

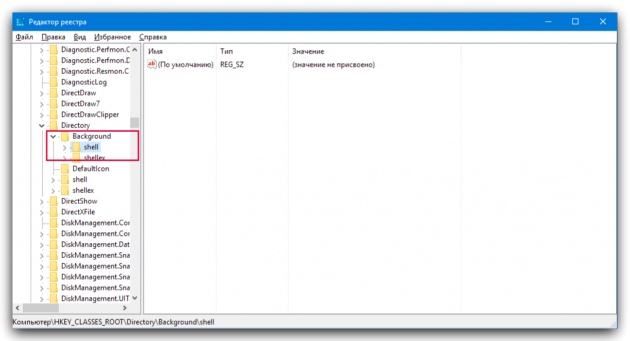
2. In the Registry editor, go to the following address:
HKEY_CLASSES_ROOTDirectoryBackgroundshell

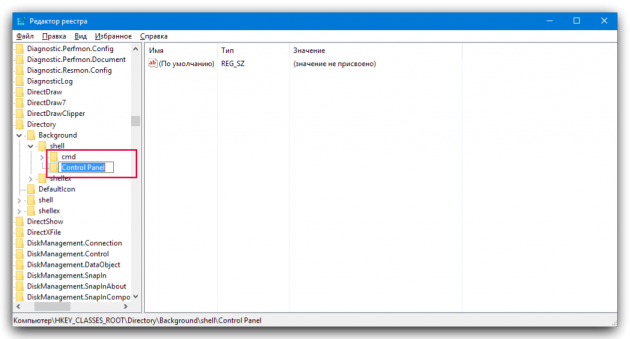
3. Now you need to create a new partition inside the shell folder. To do this, right-click on it and select the "Create" → "Partition" command in the context menu. Give it the name Control Panel.

4. Create another section called command inside the Control Panel section. This is done exactly the same as in the previous paragraph.
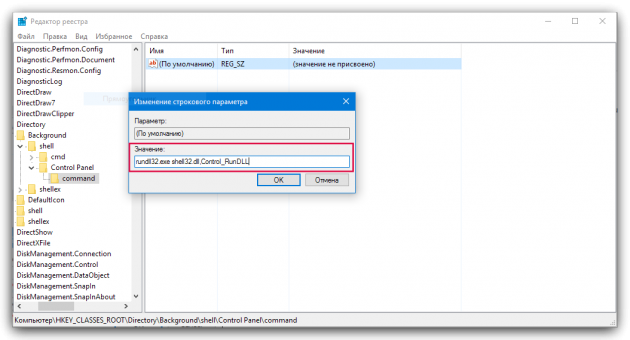
5. In the command section, double-click on the "Default" element in the right panel. The element properties window will appear, in which you need to enter in the "Value" fieldrundll32.exe shell32.dll ,Control_RunDLL.

The changes will take effect immediately. To check, you can right-click on the desktop or in the "Explorer". In the context menu, you will see a new Control Panel item, clicking on which opens the "Control Panel".
If you don't want to manually dig into the registry, you can download this archive. There you will find a file that enters the necessary data automatically. Just unzip the contents and double-click on the Add Control Panel to Context Menu.reg file. If you want to return everything as it was, then use the second file from the same archive.