Due to seasonal temperature changes or changes in the geometry of the frame (for example, if the house subsides), the sash may sag or shift. This means that it will touch the bottom or side of the window, not be fixed in the ventilation position or close loosely. There may also be problems with the handle: it will be difficult to move.
All this is easy to fix with proper adjustment and lubrication.
Window fittings allow you to move the sash in relation to the frame in all three planes. To do this, you just need to wrap or unscrew the appropriate fasteners.
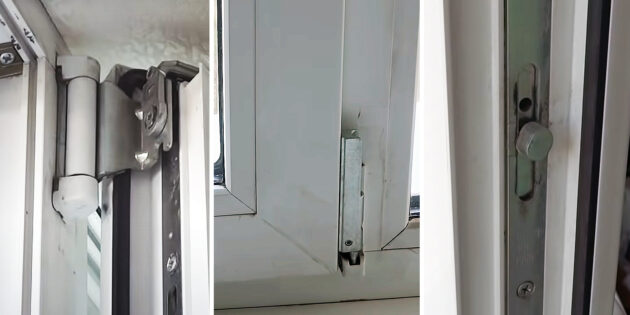
The craftsmen adjust metal-plastic windows with a special universal key. But you might as well do it with a simple set of tools. Everything you need is easy to find at home or buy at a construction or auto shop.
Here's what you'll need:
Insert the hexagon into the adjusting hole of the swing-out mechanism of the upper hinge.
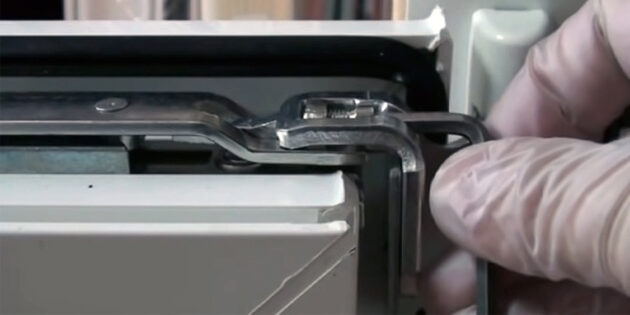
Make 1-2 turns clockwise to bring the top of the sash towards the frame and thereby lift its lower part. With a slight sagging, this will be enough.
If the previous method did not help, then the lower part of the window needs to be additionally raised.
Open the flap slightly and remove the plastic cap from the bottom hinge. Insert the hexagon into the upper hole.

Make one turn clockwise and check how the window closes until the sash stops clinging to the frame. Do not overdo it, otherwise it will jam at the top of the window!
Put the protective cap back in place.
If the loop adjustment stroke was not enough, the situation can be corrected by wedging the frame.
Remove all the beads, gently prying them with a knife. First the long ones on the sides, then the lower one and last of all the upper one.
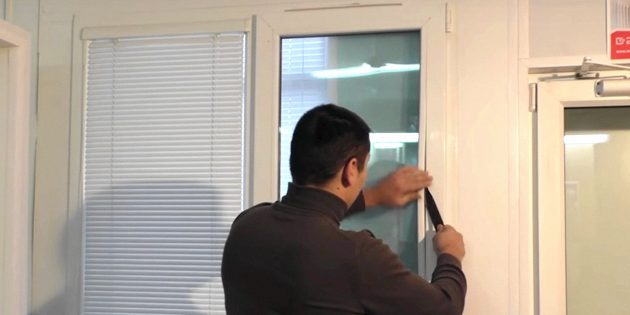
Holding the double-glazed window with your hand, lift the edge of the sash and determine in which places gaps form along the perimeter of the glass.

Insert small pieces of plastic 2-3 mm thick into these slots. They will fill the gaps and prevent the sash from sagging under the weight of the double-glazed window.
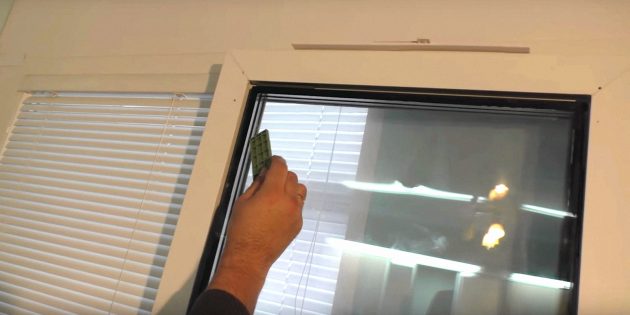
While holding the glass, try to close the sash and make sure that it no longer clings to the frame.

Put the beads back in place and press until they click. First the upper one, then the lower one, and then the long side ones.
Open the window and insert the hexagon into the side hole of the bottom hinge.

Make 1-2 turns clockwise to move the lower part of the sash towards the slope.
If this does not help, slide the upper part of the sash. Open the flap and insert the hexagon into the opening of the swing-out mechanism.
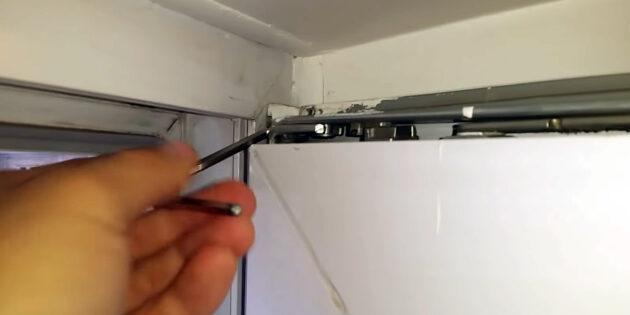
Make 1-2 turns clockwise to shift the sash towards the slope.
Check how the window opens and, if necessary, make a couple more turns clockwise.
Use a hexagon, Torx T15 or a wrench to turn all the clamping eccentrics around the perimeter of the sash.

Install the clamps in such a position that they are located as close as possible to the seal. Usually there is a label on the eccentrics, and it needs to be moved from the "12 o'clock" or "9 o'clock" position to the "3 o'clock" position.

After that, the sash will become more tightly pressed against the frame and drafts will disappear.
Open the window slightly and press the lock tab at the end of the sash.

Slide the top of the window to the frame, without releasing the lock, and move the handle to a horizontal position.

Release the lock and close the window.
Open the window and clean all accumulated dust around the perimeter of the sash and especially in its upper part.
Lubricate all moving parts of the hardware with silicone grease or engine oil.
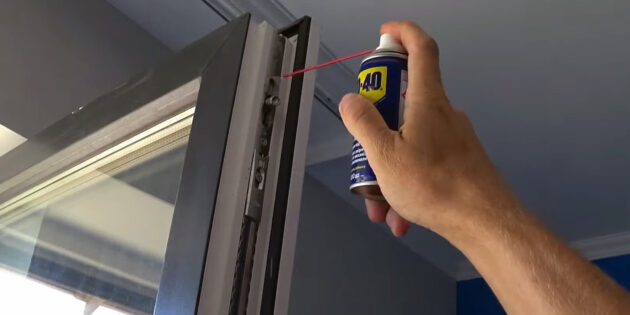
The places for lubrication are marked with an oilcan symbol, but you can drip grease into all visible holes — there will be no harm from this.
After that, close the window and turn the handle up and down several times so that the lubricant spreads through all the mechanisms.