This material was written by our reader Anton Andrushchenko.
Everyone knows that out of the box, the iPhone does not know how to use media library files as ringtones, and the entire user's choice is reduced to a list of 25 standard ones. How do I create an iPhone ringtone in iTunes?. One way out is to use the Store and buy ringtones there, but today I would like to share a simple way to make a ringtone from any song present in your iTunes library.
The instructions below describe the procedure for creating a ringtone in iTunes 11 for Mac OS, in other things, the procedure should not be radically different for the 10th version and suitable for Windows users.
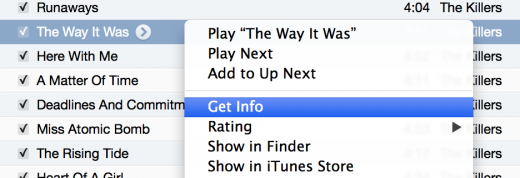
1) So, open iTunes, select a song, open the context menu, click on «Get Info»
2) In the window that appears, go to the Options tab, set the time interval of the song that will be used for the ringtone. Tested, works for 30-second segments.
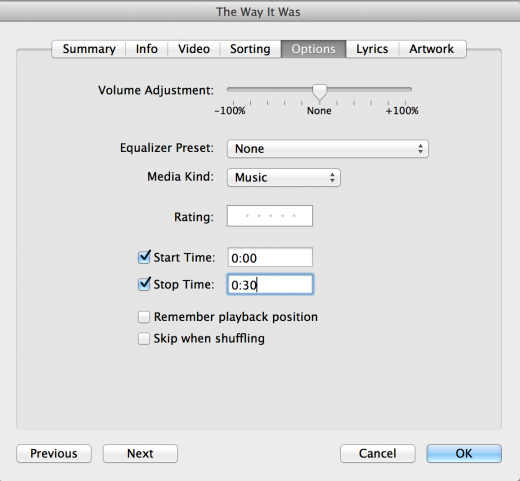
3) Click OK.
4) We call the context menu on the song that we just edited, select the item: «Create AAC Version».
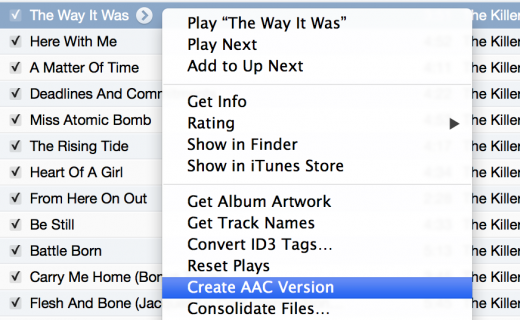
4.1) If you can't find the menu item «Create AAC Version», you should change the iTunes import settings, to do this go to «iTunes → Preferences», on the tab «General» click the button «Import Settings...»
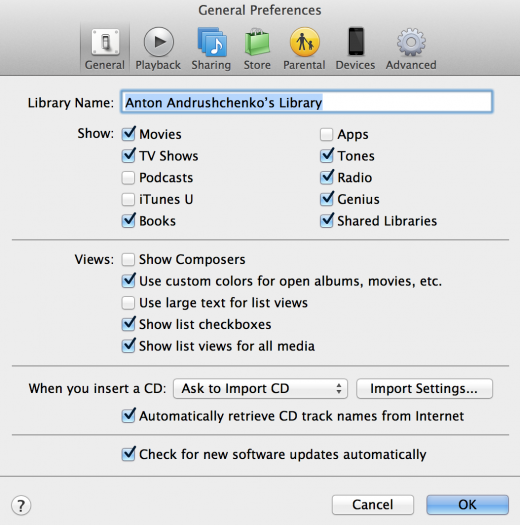
In the window that opens, select the encoder we need: AAC Encoder
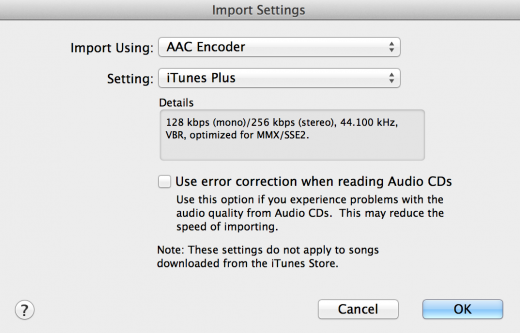
Click «OK». Now, in the context menu for the song, we can perform «Create AAC Version».
5) Next to the original song, we will have a copy of it with a duration of 30 seconds. Open the context menu on it, click «Show in Finder» (for Windows users, the item will be called «Show in Explorer »). In the window that opens, rename the resulting file, change the extension from m4a to m4r.
Open the received file using iTunes: it is automatically recognized as a ringtone. It would be possible to stop there, connect the iPhone and transfer the results. But before that, I recommend putting things in order:
1) Delete the shortened song from the iTunes library, select «Keep File», in the pop-up window.

2) Remove the time constraints from the source file (see Step #1).
Photo: phil dokas` Flickr