There are several ways to do this. In all cases, you will get a hexagonal snowflake. So choose the option that you like best.
Cut a square out of the paper. To make it from an A4 sheet, fold one short side to the long side and cut the resulting rectangle from the side.
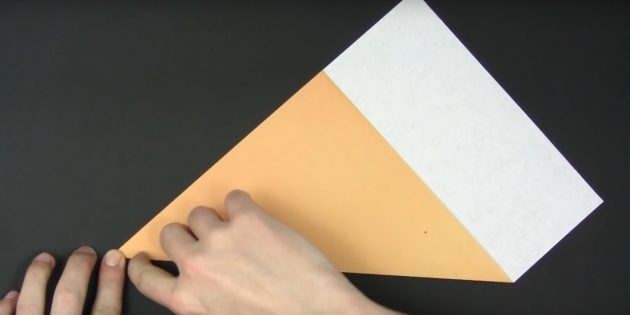
Bend the square diagonally. Then fold the shape in half, connecting two opposite sharp corners. Do not bend the paper completely, but only mark the place of the fold at the bottom.

Straighten the figure. Fold one side up so that the bottom corner of the resulting triangle is at the mark.
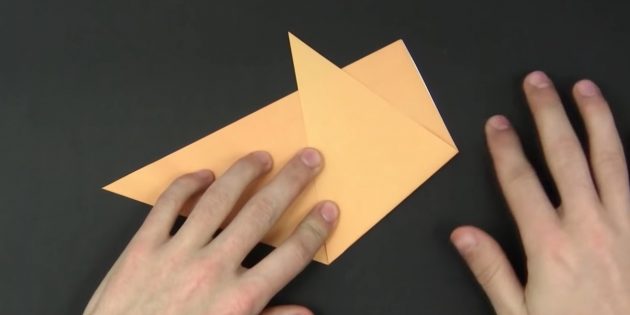
Fold the other part in the same way, but on the reverse side. The upper side triangles should be the same, so trim the shape if necessary.

If it is not possible to fold the corners evenly, make a pencil marking, as shown here:
On the reverse side, put the right part of the figure on the left, folding it in half.
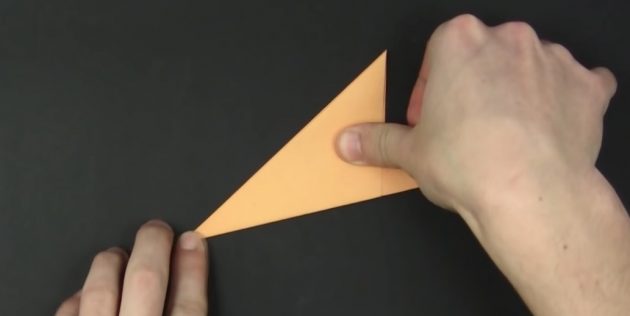
Turn the shape over and you will see a smooth straight edge. Cut the paper on it. You can circle this edge with a pencil for convenience.

Here is a video tutorial:
Cut a square out of the paper. Fold it diagonally.
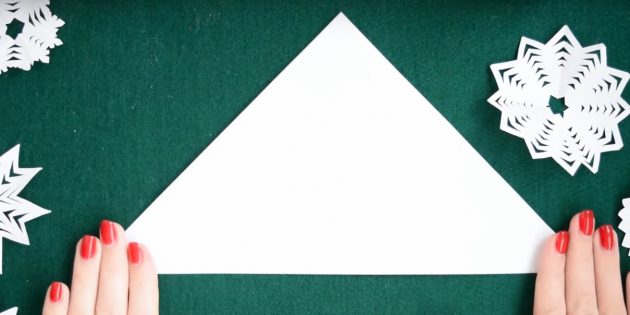
Then bend the triangle in half.
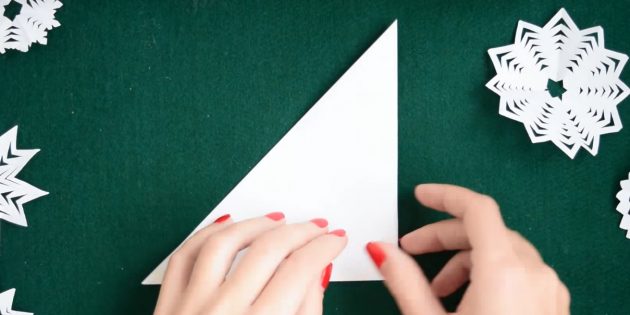
Place the resulting shape at a right angle up, and bend it to the left. Fold the right side slightly beyond the middle of the triangle.
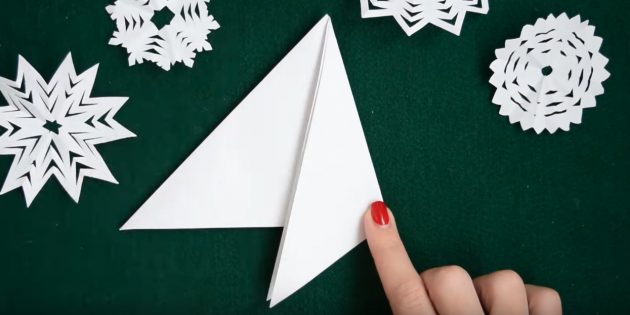
Fold the left side over the right side. The curved triangles should turn out to be the same.

On the reverse side, cut the paper along the line, as in the previous version.
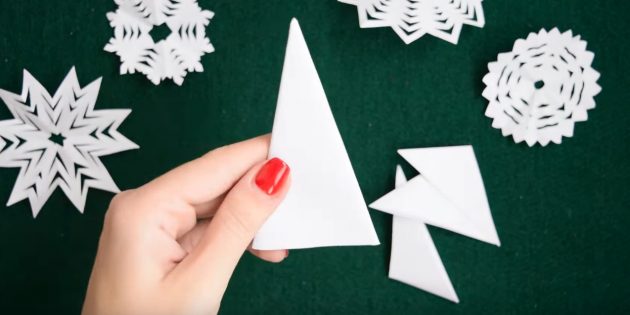
Visual process:
On the resulting triangle, you need to draw only half of one vertex of a snowflake. Remember: the middle of this vertex is located on the fold of the paper billet.
Draw the pattern with a pencil. Don't push it too hard.
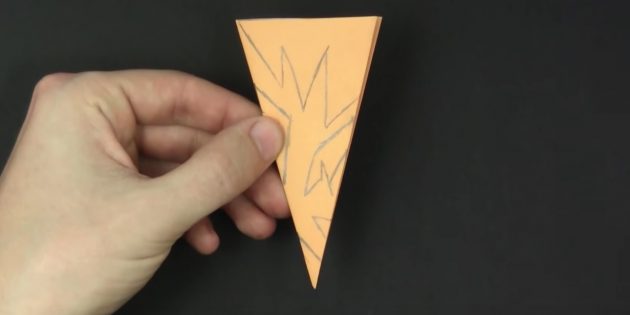
You can come up with a pattern yourself or use ready-made templates from the Internet. In fact, there are a lot of snowflake patterns and the pattern can be any, because everything depends on the imagination of the person drawing. So don't be afraid to show it.
Cut the paper along the drawn lines. Where the pattern is small, it is more convenient to use small nail scissors.
Then carefully straighten the paper.
If you don't like the folds on a snowflake, cover it with a cloth or parchment and iron it.
All flat snowflakes are cut according to the same principle, but the ways to make three-dimensional shapes differ from each other.
For example, for such a fluffy decoration, you need to cut out several identical snowflakes of different sizes and glue them on top of each other:
For this snowflake, the same carved details need to be glued in a circle:
A similar option:
This snowflake is made very simply, but it looks amazing:
To collect such a snowflake, you will need a template. Print it out, cut out the details and glue it together as shown in the video:
With this master class, you will create a large openwork snowflake from six identical parts:
For this similar decoration, you will also need six paper squares, but the details are glued together differently:
Here you can see how to glue a snowflake from individual paper strips:
And here is another version of the winter figure made of strips of paper: